Difference between revisions of "Adding a rule"
| Line 33: | Line 33: | ||
==== Configuring a node ==== | ==== Configuring a node ==== | ||
Each node contains attributes & options which you can modify. To modify the attributes of a node, move your mouse over the node and click on the "Gear" button that appears near the top right corner of the node (Beside the "X" button). A window will popup to allow you to configure the node. | Each node contains attributes & options which you can modify. To modify the attributes of a node, move your mouse over the node and click on the "Gear" button that appears near the top right corner of the node (Beside the "X" button). A window will popup to allow you to configure the node. | ||
| + | |||
| + | ==== Steps ==== | ||
# Drag "Metric" nodes into the working area, one for each '''Input''' metric. | # Drag "Metric" nodes into the working area, one for each '''Input''' metric. | ||
# Select the correct measurement and metric for each created "Metric" node. Read [[#Configuring_a_node|how to configure a node]] if you're unsure how to perform this step. | # Select the correct measurement and metric for each created "Metric" node. Read [[#Configuring_a_node|how to configure a node]] if you're unsure how to perform this step. | ||
| − | # | + | # |
| − | |||
=== Node Types === | === Node Types === | ||
Revision as of 14:19, 19 September 2019
Contents
Pre-requisites
A rule requires design and logical programing in order for it to work correctly. If this is your first time creating a rule, please read this guide first.
You should also be similar with the basic measurements and its concepts. Please read this section if you require a refresher.
You should
- Know what event the Rule should detect.
- Know what you would like Senfi to do (Action) when the event is detected
- Have already created the Input measurement & metrics.
- Know the thresholds or values which indicates occurrence of event.
- Be able to send records to Input measurement & metric.
- (Optional) Be able to send simulated records to Input measurement & metric (to simulate occurrence of event or situation)
Adding a New Rule
- Login to the CMS
- Go to the Rule tab
- Click the + button to add a new rule.
- Give the rule a descriptive name. This will be shown to users of the dashboard.
- Select the Severity of the rule.
- Select Evaluate Type of the rule. Read this section if you require a refresher
- (Optional) Select the Access Group that would be able to view and modify the rule. Defaults to all users in your organization.
- Give the rule a descriptive Description. The Description would be the default content for any Action
- Construct the Conditions using the editor. Constructing the Condition for more details.
- Save when done
- (Optional) Send records to simulate event to test the rule.
Constructing Condition
This section will guide you to construct a condition using the Editor when adding/editing a Rule in the CMS
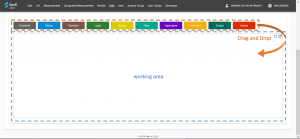
The Rule Editor is a graph based "Drag and Drop" editor. Each node in the Editor represents either a Input, Data Transformation, Comparison or an Action. Arrows are used to link the nodes and indicates flow of data between nodes.
Configuring a node
Each node contains attributes & options which you can modify. To modify the attributes of a node, move your mouse over the node and click on the "Gear" button that appears near the top right corner of the node (Beside the "X" button). A window will popup to allow you to configure the node.
Steps
- Drag "Metric" nodes into the working area, one for each Input metric.
- Select the correct measurement and metric for each created "Metric" node. Read how to configure a node if you're unsure how to perform this step.
Node Types
- Constant
- Metric
- Operator
- Logic
- Range
- Filter
- Aggregate
- Function
- Output
- Action

