Difference between revisions of "V2/CMS Tutorial/Getting Started/UI Navigation"
From Senfi Docs
Elysia.Tan (talk | contribs) |
Elysia.Tan (talk | contribs) |
||
| Line 5: | Line 5: | ||
[[File:UI Navigation.png|500px|center]] | [[File:UI Navigation.png|500px|center]] | ||
| − | From the '''left''' panel, you can create and manage your own content | + | From the '''left''' panel, you can create and manage your own content, integrate 3rd party systems with Senfi and debug them, as well as, set the organisation settings. |
'''Note:''' Your options in the left panel vary depending on your access rights. The user guide examples assume that the user has full permissions to all functions in Senfi. | '''Note:''' Your options in the left panel vary depending on your access rights. The user guide examples assume that the user has full permissions to all functions in Senfi. | ||
The '''top''' panel acts as a submenu of the left panel. The options displayed vary depending on the function chosen in the left panel. | The '''top''' panel acts as a submenu of the left panel. The options displayed vary depending on the function chosen in the left panel. | ||
Revision as of 15:42, 18 June 2021
Navigating the CMS
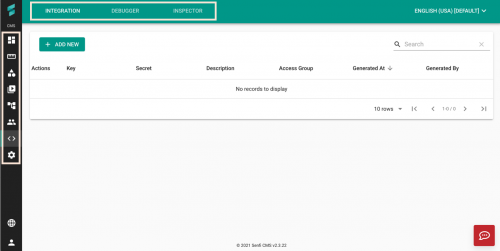
Navigation within the CMS is mainly done via the left and top panels.
From the left panel, you can create and manage your own content, integrate 3rd party systems with Senfi and debug them, as well as, set the organisation settings.
Note: Your options in the left panel vary depending on your access rights. The user guide examples assume that the user has full permissions to all functions in Senfi.
The top panel acts as a submenu of the left panel. The options displayed vary depending on the function chosen in the left panel.

